Maintaining the exterior of your home is essential, especially in coastal towns like Hermanus where weather conditions can accelerate wear and tear. One of the most commonly overlooked elements of exterior maintenance is the fascia board. However, when properly protected with exterior paint for wood, fascias not only enhance the appearance of your home but also play an important role in protecting the roof structure.
Fascia boards are exposed to sun, wind, rain, and salt air throughout the year. Consequently, if they are not properly prepared and painted, the wood can deteriorate quickly.
Fortunately, with the right preparation methods and the correct exterior paint for wood, homeowners can extend the lifespan of fascia boards while improving the overall look of their property.
In this guide from Build it Hermanus, we explain the step-by-step preparation process, recommend the best paint types and finishes, and highlight how to prevent moisture-related issues that commonly affect exterior wood.
Understanding the Role of Fascia Boards
Before beginning any painting project, it is important to understand why fascia boards require proper maintenance.
Fascias are the horizontal boards installed along the lower edge of the roof. They support the gutter system and provide a clean, finished appearance to the roofline.
Because they are constantly exposed to the elements, fascias require regular inspection and protection with high-quality exterior paint for wood.
When fascia boards are properly painted and sealed, they offer several benefits:
- Protection against rain and moisture
- Resistance to UV damage from sunlight
- Prevention of wood rot and decay
- Improved curb appeal for your home
Therefore, investing time in correct preparation and painting can prevent costly repairs in the future.
Step-by-Step Preparation Guide for Exterior Wood Fascias
Proper preparation is the most important part of any painting project. Even the best exterior paint for wood will fail if the surface has not been prepared correctly.
Step 1: Inspect the Fascia Boards
First, carefully examine the fascia boards for signs of damage.
Look for:
- Cracked or peeling paint
- Soft or rotting wood
- Loose nails or screws
- Mould or mildew growth
If you notice sections of wood that are severely damaged, it is best to replace them before painting.
Otherwise, minor issues can usually be repaired during preparation.
Step 2: Clean the Surface Thoroughly
Next, remove dirt, dust, mould, and salt residue from the fascia boards. Because exterior wood accumulates contaminants over time, cleaning is essential for proper paint adhesion.
To clean the surface:
- Use a stiff brush to remove loose debris
- Wash the wood with mild detergent and water
- Rinse thoroughly with clean water
- Allow the wood to dry completely before proceeding
In coastal areas like Hermanus, salt deposits can accumulate on exterior surfaces. Therefore, thorough cleaning ensures the exterior paint for wood bonds effectively.
Step 3: Remove Old or Peeling Paint
If the fascia boards have previously been painted, any loose or peeling paint must be removed.
Use the following tools:
- Paint scraper
- Wire brush
- Sandpaper or an electric sander
Removing old paint creates a smooth surface that allows new exterior paint for wood to adhere properly.
Step 4: Sand the Wood Surface
After removing loose paint, sanding helps create a uniform surface.
Start with medium-grit sandpaper and finish with a finer grit to smooth the wood. As a result, the paint will spread more evenly and produce a more professional finish.
In addition, sanding opens the wood grain slightly, allowing primers and paints to penetrate more effectively.
Step 5: Repair Cracks and Imperfections
Once sanding is complete, inspect the fascia boards again for imperfections.
Small cracks or holes can be repaired using exterior wood filler. After the filler dries, sand the area lightly to ensure it blends with the surrounding wood.
This step improves both the appearance and durability of the final paint job.
Step 6: Apply a Suitable Wood Primer
Before applying exterior paint for wood, a high-quality primer should be used. Primer helps seal the wood, improves paint adhesion, and increases the lifespan of the paint system.
Primer also helps prevent:
- Moisture penetration
- Staining from wood tannins
- Uneven paint absorption
Allow the primer to dry fully before applying the topcoat.
Choosing the Right Exterior Paint for Wood Fascias
Selecting the correct paint is just as important as preparing the surface properly.
Because fascias are exposed to harsh weather conditions, durable coatings are essential.
Recommended Types of Exterior Paint for Wood
The following paint types work particularly well for fascia boards:
Acrylic Water-Based Paint
Acrylic paints are one of the most popular choices for exterior wood.
Benefits include:
- Excellent UV resistance
- Flexible coating that resists cracking
- Easy cleaning with water
- Fast drying time
Additionally, acrylic paints perform well in coastal environments where humidity levels fluctuate.
Exterior Enamel Paint
Exterior enamel paints provide a harder, more durable finish.
Advantages include:
- Strong resistance to scratches and weather
- Long-lasting protection
- Smooth professional appearance
Because fascia boards often support gutters, enamel paints offer additional durability against water exposure.
Recommended Paint Finishes for Fascia Boards
Besides choosing the correct paint type, selecting the right finish is also important.
Satin or Low-Sheen Finish
Satin finishes are often recommended for fascia boards because they balance durability and appearance.
Key benefits include:
- Moderate sheen that enhances colour
- Easier cleaning compared to matte finishes
- Improved resistance to dirt and moisture
Semi-Gloss Finish
Semi-gloss finishes are also suitable for fascia boards.
Advantages include:
- High durability
- Strong moisture resistance
- Reflective surface that highlights architectural details
As a result, semi-gloss coatings are commonly used on trims, doors, and fascia boards.
Avoiding Moisture-Related Issues
One of the biggest threats to exterior wood is moisture. Because fascia boards sit directly beneath the roofline, they are particularly vulnerable to water exposure.
Fortunately, using the correct preparation techniques and exterior paint for wood can prevent most moisture-related problems.
Ensure Proper Gutter Maintenance
Blocked gutters can cause water to overflow and saturate fascia boards. Therefore, it is important to regularly clean gutters and ensure proper drainage.
Seal All Exposed Wood
Unsealed wood absorbs moisture quickly. Applying primer and multiple coats of exterior paint for wood creates a protective barrier that reduces water penetration.
Allow Wood to Dry Before Painting
Painting damp wood traps moisture beneath the paint layer. Consequently, this can cause blistering, peeling, or premature paint failure.
Always ensure the fascia boards are completely dry before applying primer or paint.
Apply Multiple Paint Coats
For maximum protection, apply at least two coats of exterior paint for wood. Each layer strengthens the protective barrier and improves long-term durability.
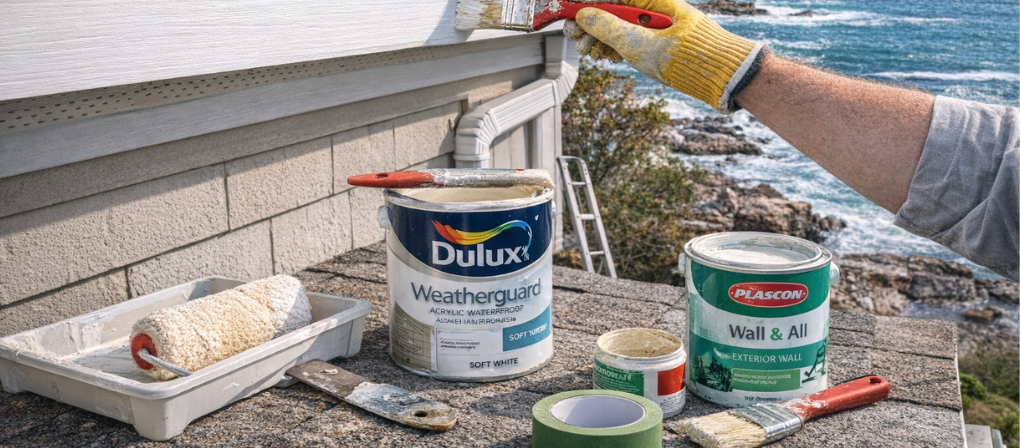
Tools and Materials You May Need
To complete this project successfully, the following tools and materials are recommended:
- Exterior paint for wood
- Exterior wood primer
- Paint scraper
- Wire brush
- Sandpaper or sander
- Exterior wood filler
- Paint brushes or rollers
- Ladder and safety equipment
All of these supplies are available at Build it Hermanus, where customers can also receive professional advice for their painting projects.
Why Proper Fascia Maintenance Matters
Regular maintenance of fascia boards offers several important benefits for homeowners.
Improved Roof Protection
Well-maintained fascias protect the edges of your roof and help support the gutter system.
Increased Property Value
A freshly painted roofline significantly improves the overall appearance of your home.
Reduced Repair Costs
Most importantly, preventing wood rot and moisture damage reduces the need for costly structural repairs.
Preparing and Painting Fascia Boards
Preparing and painting fascia boards is a straightforward project when the correct steps are followed.
By cleaning the surface, removing old paint, sanding the wood, repairing imperfections, and applying primer, homeowners can create the perfect base for a long-lasting finish.
Equally important, selecting the right exterior paint for wood ensures that fascia boards remain protected against sun, rain, and coastal conditions.
With proper preparation and quality materials, your fascia boards will maintain their strength and appearance for many years.
For expert advice, reliable products, and high-quality exterior paint for wood, visit Build it Hermanus.
Our team is ready to help you choose the best paints, tools, and materials to keep your home looking its best.