Categories
Do It Yourself How To

Get Crafty: Create a Stylish DIY Concrete Tray with Ease!

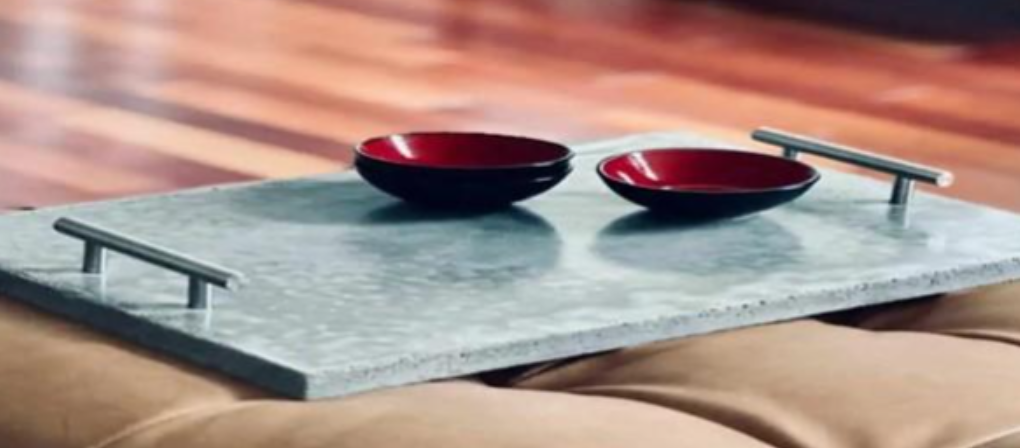
Who said DIY home decor was only for the pros? Today, I’ll show you how to whip up your very own fabulous concrete tray using the reverse casting technique. With straight handles and a smooth surface, this functional piece will add a touch of elegance to your space in no time.

Okay, let’s get started on making your very own concrete tray! But first, grab your favorite beverage and put on some lively music. It’s time to unleash your inner DIY enthusiast!

Materials List for Your DIY Concrete Tray:

The Tray Mold:

  • These 5″ handles (the coolest ones you can find, of course)
  • PVC casing 2 ¼” (this stuff is a dream to work with)
  • 1″ Foam insulation board (or ¾” plywood if you’re feeling adventurous)
  • Dowel ¼” diameter
  • (8) Wood screws 1 ¼” #8 or 10
  • Power drill
  • Phillips screwdriver
  • ¼” Forstner bit (for those perfectly clean dowel holes)
  • Scissors
  • Acetate film sheet (optional, but it helps keep things smooth)
  • Snap-off razor knife
  • Painter’s tape
  • 12″ Ruler
  • Orbital sander
  • Level – 9″
  • Dremel Multi-tool or flush trim saw (for the fancy finish)
  • Chisel

Concrete Materials:

  • Concrete mix
  • Disposable bowl
  • Disposable cup
  • Durable nitrile gloves
  • Safety glasses
  • Safety mask – rated for silica dust

Sealing and Finishing:

  • Orbital sander
  • 180 and 320 grit sandpaper
  • Sealer
  • Foam brush
  • Silicone bumpers

Now, before we dive in, let’s have a quick chat about some material notes:

Tray Thickness and Handles: Initially, I thought we were limited to a ¾” thick tray due to the screw length for the handles. But fear not! You can go all the way up to a luxurious 1″ thick tray. 

It’s sturdier and less likely to crack. Plus, it won’t weigh you down too much. Trust me, even the ¾” version is lighter than it looks!

PVC Casing: Ah, the beauty of PVC casing. It’s like a concrete maker’s secret weapon. It cuts like butter, and concrete won’t stick to it. Working with it is an absolute breeze, making your DIY dreams come true.

Foam Board: If you’re not feeling the foam, you can swap it out for ¾” plywood. Just be cautious about concrete seeping into the plywood around the dowels. However, using plywood allows you to overlap the base with the sides and screw them together, making vibrations a piece of cake.

Forstner Bit: Don’t underestimate the power of the Forstner bit! It ensures clean dowel holes in the foam, preventing any concrete mishaps. We want those dowels to fit like a glove and keep things sturdy.

Acetate: Want that flawless finish? Consider using acetate as a layer between the foam board and concrete. It smooths out any imperfections and gives your tray a polished look.

Dremel Multi-tool or Flush Trim Saw: While a multi-tool makes life easier, a flush trim saw can also do the trick. If you opt for the saw, it’ll require a little more effort. But hey, we’re all about enjoying the process, right?

Timing: Good news! This DIY adventure should take you less than 2 hours of actual working time. But remember, patience is key. Allow 2-4 days for curing and sealing. Rome wasn’t built in a day, and neither is your concrete tray!

Alright, let’s jump into it!

How To Make A DIY Concrete Tray in 12 Steps

Step 1. Cut Your Base Mold Piece

Let’s kick things off by cutting the foam board for the base of your concrete tray. Grab your retractable snap-off blade knife and get ready for some foam-cutting fun! 

Start by scoring the board lightly with a pencil, then go over it with the blade to make the cut. 

Remember to use the factory-cut edges for the best results. Make two cuts, keeping the blades long and holding the knife as perpendicular to the board as possible. Voila! You’ve got your base mold piece, measuring a cool 18×12″.

Step 2. Cut Dowel Pieces

Now it’s time to tackle the dowel pieces. Grab a hand or miter saw and cut the wood dowel into four equal pieces, each measuring 2″ in length. Aim for ninja-level precision here and make sure all four pieces are the same length.

Step 3. Cut The Sides Of The Concrete Tray Mold

Let’s shape things up! Take the PVC molding and cut it into four pieces: two measuring 18″ and two measuring 13 ½”. These will be the sides of your concrete tray mold. Get those PVC cutters ready and let the cutting commence!

Step 4. Cut Acetate To Fit The Base

Time to add a touch of smoothness to your tray. Lay a piece of acetate film on the table and place the foam board on top. Carefully trace around the base and cut the acetate to fit perfectly with a trusty pair of scissors. This will give your tray a flawless finish.

Step 5. Fasten The Sides Of The Concrete Mold Box

Let’s secure those sides, shall we? Wrap the PVC boards around the foam base and use clamps to hold them in place. Attach the short ends to the long ones by drilling two pilot holes and then screwing in each screw. Keep it tight and secure!

Step 6. Cut The Holes For The Handle’s Screws

Now it’s time to plan the perfect spot for your handles. Place the acetate on top of the foam base, ensuring a snug fit without any air bumps underneath. 

To keep things clean and precise, tape the ends with blue tape. Measure 4 ½” from each edge and mark the centre for your screw hole. 

Double-check that everything lines up with the handles. Carefully drill the holes using a low torque setting on your drill. Insert the dowels into the holes, stopping when they are flush with the bottom of the foam base. These exposed dowels will serve as your fill line for the concrete mix.

Step 7. Mix The Concrete And Cast The Tray Mold

It’s time to get your hands dirty with concrete mixing! Aim for a mud pie consistency by combining two batches of concrete mix. Scoop the mix into the Mold until it’s flush with the tops of the dowels. 

Remember not to fully cover the dowels, but a little bit is fine. Give the Mold a good vibration to release any air bubbles and ensure a smooth surface. Slide the Mold back and forth on your work surface to self-level the mix and use an orbital sander without sandpaper to vibrate along each side. 

Take your time with this step, and don’t be afraid to vibe it for about 15 minutes if needed. Before letting it cure, carve out a bit of concrete around each dowel to ensure a flush fit for the screw heads.

Step 8. Demold The Tray

The moment has arrived to unveil your masterpiece! Unscrew the sides of the Mold, but make sure the tray has a frosted appearance and the sides are no longer moist. 

Place a towel on your work surface, flip the Mold over, and gently remove the foam board and acetate. Hang on to that acetate sheet—it might come in handy for the next step.

Step 9. Fasten The Handles To The Concrete Tray

Time to add some handles to your tray! Before you proceed, let the concrete cure for an additional day or two to ensure maximum strength. 

Once you’re ready, use a Dremel multi-tool or a flush-cut trim saw to cut the dowels flush with the tray. Take extra care not to scratch the tray while cutting. If needed, protect the tray with the saved acetate sheet. Pre-drill pilot holes for each handle screw, ensuring they align perfectly. 

Turn the tray on its side and drill the screws until they peek through the wood on the front side. If any screws don’t align with the handles, use a larger drill bit to redrill the pilot hole. Secure those handles in place!

Step 10. Sand The Serving Tray

Time to smooth things out and make your tray even more beautiful! Grab an orbital sander and some sandpaper (180 or 220 grit) to sand the bottom of the tray. Switch to a 320 grit pad and sand the top and sides for a flawless finish. 

Even if you love that glossy sheen, lightly sanding it is important to prevent easy scratching. Don’t forget to go over the back of the tray again with the 320 grit.

Step 11. Seal The Tray

Give your tray the royal treatment by sealing it. Use a foam brush to apply the sealer to the top, then flip the tray over by its handles and seal the sides and back. 

If you have any rough edges, make sure to push the brush into them to get that sealant deep into the holes. Applying a second coat is highly recommended for added protection. Wait approximately 24 hours before applying the second coat, and within 6-8 hours after sealing, your tray will be ready to use!

Step 12. Add Silicone Bumpers To The Bottom Of The Concrete Tray

Last but not least, let’s ensure your tray doesn’t scratch your table. Attach silicone bumpers to the bottom of the tray—one at each corner, about an inch in. These little protectors will keep your table safe while adding a touch of style to your DIY creation.

And there you have it—a fantastic, handmade concrete tray that’s ready to impress! Enjoy serving your favourite goodies in style while basking in the glory of your DIY prowess.

Send us a photo of your new concrete tray, we would love to see it, you can upload your images in the comments section!

Plan your next DIY project with Build it Hermanus and get the job done right, first time. Please follow us on social media to stay up to date with our latest sizzling specials and promotional offers!

Or log on to our online store and shop from the comfort of your home: www.buildit-store.co.za

Build it Hermanus offers added value services in respect of hardware retailing; embracing all activity within the building materials industry, focusing specifically on the building of; urban, township, rural housing as well as all home improvements and do it yourself.
Categories
Do It Yourself How To

How To Build a Patio Dinner Table Step by Step

Building a charming outdoor table can be a great DIY project for those who enjoy woodworking, as it not only allows you to showcase your creativity and craftsmanship, but also provides a functional and aesthetically pleasing addition to your backyard or patio space, where you can host intimate gatherings, share meals with family and friends, or simply relax and enjoy the outdoors.

Building an outdoor patio table requires careful consideration of the wood’s durability and resistance to weathering, it’s important to choose high-quality wood, treat it properly with sealant or stain, and use strong joints and hardware to assemble the table.

Today we will be Building a 2-meter wide, 8-meter long, and 2-meter-high patio table made of Meranti hardwood.To begin, you’ll need to gather all the necessary tools and materials, by following these steps, you can create a beautiful and functional table that will add rustic charm to the outdoor area of your home.

Materials:

  • 16 Meranti hardwood boards (2m x 0.2m x 0.05m)
  • 8 Meranti hardwood boards (8m x 0.2m x 0.05m)
  • 4 wooden legs (2m x 0.1m x 0.1m)
  • Stainless steel screws
  • Wood glue
  • Sandpaper
  • Outdoor varnish or sealant

Tools:

  • Measuring Tape
  • Circular saw or handsaw
  • Drill
  • Screwdriver
  • Clamps
  • Sanding block or electric sander
  • Paintbrush (if using varnish or sealant)

Step 1: Cut the Boards

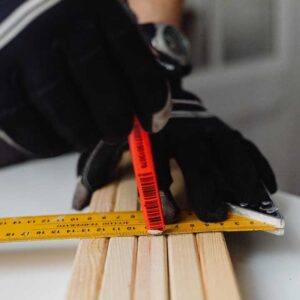
Using a measuring tape, mark and cut the 16 2-meter-long Meranti boards into 4 equal lengths of 0.5 meters each. These will be used as the table’s tabletop planks.

Then, cut the eight 8-meter-long Meranti boards in half to make sixteen 4-meter-long pieces. These will be used to create the table’s frame. Lastly, cut the four wooden legs to 2 meters in length.

Step 2: Create the Tabletop

Lay the four tabletop planks side by side on a flat surface. Use wood glue to attach them together. Clamp the planks tightly and leave to dry for several hours.

Step 3: Create the Table Frame

Place the sixteen 4-meter-long pieces of Meranti in a rectangular shape. Attach the corners with screws and wood glue.

To make the joints stronger, drill pilot holes before attaching the screws. Use the measuring tape to ensure that the rectangle’s dimensions are 2 meters wide by 8 meters long.

Step 4: Attach the Tabletop to the Frame

Place the tabletop on top of the table frame. Use stainless steel screws and wood glue to attach the tabletop to the frame. Again, drill pilot holes to make the joints stronger.

Step 5: Attach the Legs

Flip the table over and attach the legs to the corners of the frame. Use stainless steel screws and wood glue to secure them in place. Again, drill pilot holes to make the joints stronger.

Step 6: Sand and Finish the Table

Use sandpaper or an electric sander to smooth out any rough edges and surfaces. Apply an outdoor varnish or sealant to protect the table from the elements. Follow the manufacturer’s instructions for application and drying times.

Your 2-meter wide, 8-meter long, and 2-meter high Meranti hardwood patio dinner table is now complete and ready to use with friends and family😉

For those who appreciate the beauty and value of handmade furniture, building a patio table from scratch can be a fulfilling and rewarding endeavour. The satisfaction of seeing your creation come to life and enhance your outdoor space is worth the effort and dedication put into every stage of the building process.

All the tools and materials used in this article are available instore from Build it Hermanus, for building materials, do-it-yourself home improvement tools, and expert advice.

Please send us a photo of your completed creation, we would love to see it, you can upload your images in the comments section!

Follow us on social media, to stay up to date with our latest sizzling specials and promotional offers!

Build it Gansbaai/Hermanus offers added value services in respect of hardware retailing; embracing all activity within the building materials industry, focusing specifically on the building of; urban, township, rural housing as well as all home improvements and do it yourself.

Categories
Do It Yourself

How to Make a Butcher Block Cutting Board

Are your countertops showing undue wear and tear? Do your kitchen knives dull faster than you can sharpen them? Protect your utensils and kitchen surfaces with an attractive butcher block cutting board you can simply make yourself.

What you will need:

Tools and Materials:

  • Table Saw
  • Belt Sander
  • Tape Measure
  • Clamps
  • Router
  • Goggles
  • Dust Mask
  • Glue (GlueDevil Wood Glue or Alcolin Fast Set Wood Glue)
  • Mineral Oil (Food Grade)

Build it Hermanus stocks everything you will need for this project, you can shop in store or order all these items online, from the comfort of your own home and delivered straight to your front door. 

Check it out! www.buildit-store.co.za

Selecting The Right Timber:

Selecting the right timber for a butcher block cutting board is very important. The timber should be dense enough to withstand the constant pounding that a cutting board must endure. The material should not transfer any flavour to the foods that are processed on it. Generally, hardwoods such as Meranti, Oak, Maple, Cherry etc. are ideal. 

All African hardwoods can be used. You may want to use two different species of timber with contrasting colours to make your cutting block. Most cutting boards are made of narrow, deep strips laminated or glued together. Today we will focus on the glueing method.

Making The Cutting Board:

Size the cutting board according to your needs and specifications. The length and width may be whatever you choose, but the thickness should be at a minimum of 25mm at least, to give the board substance.

Build it Hermanus DIY

You can prepare and assemble the timber using the following steps:

Step 1:

Cut the timber half an inch longer than the desired length of the cutting board.

Step 2:

Set the fence on the table saw and rip cut the stock 1,6mm wider than the cutting board depth. Depending on the thickness of the cutting board, you may be able to get more than one piece from each board. 

For example, if the cutting board is 38mm thick and you are using 25 x 100 (1 x 4’s), you can cut two pieces from a single board.

Step 3:

Lay the pieces out on a flat surface, glue and clamp them together. 

What Glue Should You Use?

Build it Hermanus would recommend any of the following two glues for your cutting board, as they are both non-toxic and safe to use.

GlueDevil Wood Glue is a versatile fast-drying, multi-purpose wood adhesive. It is a polyvinyl acetate (PVA) which dries by evaporation of water, without heat to form a tough, sturdy, non-visible bond as it dries clear. GlueDevil Wood Glue is suitable for both hardwoods (e.g. imbula, oak) and softwoods (e.g. pine) as well as processed boards (e.g. hardboard, chipboard).

Alcolin Fast Set Wood Glue is a high quality, fast setting polyvinyl acetate-based wood adhesive. It dries clear to form a tough, non-visible glue-line which is stronger than wood. Excellent adhesion to medium woods, softwoods, processed board, leather, cloth, felt, paper, cardboard, cork, and most other porous materials.

Tip: Use the glue sparingly and remove any excess glue as soon as it squeezes out.

Step 4:

Allow the glue to set and cure, as per the instructions on the packaging.

Step 5:

Remove the clamps, use a table saw to cut the cutting board to the proper length.

Step 6:

Use the belt sander to smooth and level the cutting board.

Step 7:

Use a router or sander to round the edges of the board.

Step 8:

Apply a coat of mineral oil to the entire cutting board to keep the board from drying out and cracking, then let it sit overnight.

Step 9: 

Wipe away any remaining oil and your cutting board is now ready to use.

Caring For Your Cutting Board:

Thoroughly clean the cutting board after each use with hot soapy water and a mixture of two tablespoons of Jik to one litre of water to kill any bacteria on the board.

Always dry the board thoroughly before you store it, and apply mineral oil monthly, to extend the life of your cutting board.

Mineral oil (liquid paraffin) is a non-toxic, non-drying product derived from petroleum that is colourless, odourless, and flavourless. Its properties prevent water absorption, which makes food-grade mineral oil a popular choice for wooden kitchen items such as wooden spoons, bowls, and, of course, cutting boards.

Regular application of mineral oil will prevent cutting boards from becoming dry and brittle, which can cause a cracked board. A board that is treated with oil also prevents liquids from penetrating the board, which is often the source of germs and bacteria.

Oiling a cutting board is quite easy, pour a few tablespoons of mineral oil (rated for food) on top of the clean dry cutting board surface, then rub the oil in using a soft cloth.Be sure to cover the entire surface including the end grains, then wipe away any excess oil with a paper towel.Let your cutting board air-dry overnight and it will be ready to store.

Send us a photo of your new wooden cutting board, we would love to see it, you can upload your images in the comments section!

Plan your next DIY project with Build it Hermanus and get the job done right, first time. Please follow us on social media to stay up to date with our latest sizzling specials and promotional offers!

Or log on to our online store and shop from the comfort of your home: www.buildit-store.co.za

Build it Hermanus offers added value services in respect of hardware retailing; embracing all activity within the building materials industry, focusing specifically on the building of; urban, township, rural housing as well as all home improvements and do it yourself.
Categories
Do It Yourself

DIY Tree house Ideas and Building Tips

Have you ever thought about building your own tree-house?  This is a fun DIY project that the whole family can  participate in because there is no better feeling than making or building something special with your children. 

Today, Build it Hermanus is going to share some advice and tips for building your little house in the trees.

Is a Tree house legal?

Strictly speaking, in terms of the National Building Regulations, it depends on its size. A child’s playhouse that is no more than five square meters in size is categorized as minor building work, which means that you do not need to submit plans for a tree-house that is smaller than that. Great news! Now that we know we will not be getting into any trouble, let’s get started!

How to choose a tree to build your Treehouse in?

To build a standard 3×3 meter tree-house, choose a healthy, deciduous (hardwood) tree with a trunk of at least 30 cm diameter.  

You can calculate the diameter of your tree by measuring all around the trunk with a tape measure, then divide the measured result by pi (3.142) to give you the diameter.

Deciduous trees have a denser wood that can support greater loads. The best trees include Cedar, Maple, Oak, Fir, Beech, Ash, and Hemlock.

If you are considering building your tree-house in a softwood tree like a Pine Tree or the Natal Mahogany, you will need a thicker tree trunk to support the load. Building your tree-house too high can be dangerous for children so aim to make your platform about 2.5 meters high.  

Building a safety rail around the platform will help to prevent children from falling off. The safety rail around the platform should be about 90 cm high, with a spacing between the vertical posts of not more than 15 cm.

Keep Stability in Mind

While it is very exciting and there are so many fantastic tree-house designs (add link at the bottom) you could get off the internet, the final design will depend on the tree you have chosen.

Building a house in a tree will require careful planning, so here are some structural matters to keep in mind while designing your tree-house.

  • Build the platform close to the trunk as possible, and add diagonal bracing for extra strength, this will support any uneven loads.
  • For heavy tree houses, consider building your tree-house lower to the ground as strong winds will put pressure on trees roots.
  • A tree-house built low in the tree will experience lower wind speeds and will produce lower forces on the roots because the leverage effect of the trunk will be less.
  • Try and choose a tree with V-shaped branches as this provides extra strength and support, this means you will have 4 fixing points instead of only 2, to secure your tree-house.

Do not Restrict the Trees Growth

To accommodate the movement and growth of the tree, allow enough space (about 5cm) around the branches and trunk.  You can add spacers between the beams and the tree to allow movement.

Trees grow larger by expanding their diameter and growing new branch tips, not by stretching the entire tree. 

New layers of wood are added during the spring and summer which increase the diameter of trunks and branches. The only part of the tree to get any higher are new shoots, extending from the ends of branches. 

Once one season has passed, these shoots will not grow further but will expand as branches and the trunk do.

Use the Right Fasteners

You want your tree-house to last, so it is important to make sure that your tree stays healthy.  The use of nails, screws, or bolts can cause health problems for a tree if not fitted correctly.

Any damage to the bark of the tree, whether by nails, screws, or bolts, is a potential entry point for infections and bacteria, so it makes sense to keep the overall number to a minimum.

The general recommendation for fixing supports is to use a single, large bolt fitted into a cleanly drilled pilot hole. Nails and screws are not strong enough for major supports without causing tree damage. 

Allow for flexible supports, especially if you use more than one tree so that trees can move in the wind. Special floating brackets allow the tree to sway.

You can order floating brackets (add link to store) and treehouse fasteners (add link to store), they allow the tree more room to grow, can support heavy loads up to 12cm’s from the tree and they hold more weight than normal bolts.

Building your Tree-house

You won’t have to break the bank for this project.  It is a great idea to build with exterior-grade plywood (which is weatherproof),  and the floor can be constructed from solid shutter board.

Make sure that your floor is level and the center load is spread evenly, then building the rest of the structure becomes easier.

If you prefer, you could even fabricate the main sections of your tree-house on the ground and then hoist them into position.

Check out these incredible treehouse building plans to get started.

Now the possibilities become endless, you can add a trap door, shutters for windows, and timber steps that lead from the ground to the deck.  

Use your imagination, this is the fun part😊

Please send us a photo of your new Tree House, we would love to see it, you can upload your images in the comments section!

Plan your next DIY project with Build it Hermanus and get the job done right, first time.

Please follow us on social media to stay up to date with our latest sizzling specials and promotional offers! Or, log on to our online store and shop from the comfort of your home: www.buildit-store.co.za

Build it Hermanus offers local delivery, supplying the greater Overberg area with building materials, do-it-yourself home improvement tools, and expert advice.

Build it Hermanus offers added value services in respect of hardware retailing; embracing all activity within the building materials industry, focusing specifically on the building of; urban, township, rural housing as well as all home improvements and do it yourself.

 

Build it is a division of the SPAR Group Limited South Africa. A voluntary trading group of individually owned retail stores with more than 10 000 employees across the group, we currently have stores in South Africa, Namibia, Swaziland, Lesotho and Mozambique with plans to expand into Botswana and Zambia in the near future. We view ourselves not only as a supplier of materials, but as a partner to our valued customers in accomplishing their building or renovating projects.

Categories
Do It Yourself

Organizing Your Garage

When you think about a garage, the mind conjures up a house to store your vehicle, however, the modern garage is far more multifaceted, serving as storage, home gym, office, workshop, or flatlet.

Whatever your garage is used for, if you want to maximise this useful space to it’s full potential, keeping it organised is very important. We have put together some useful tips in keeping your garage organised, as a lack of space will restrict your movement and from using your garage properly.

What will you be using your garage for?

You need to have a purpose in mind before you can effectively start organising your garage. This will ensure that you fit the right shelves, cupboards, or facilities to make the most out of the space you have available, beforehand.

Storage

When organising your garage, storage is essential part of keeping this space uncluttered so that you can still fit your vehicle in and move around without bumping into things.

Vertical wall-mounted shelves will help by keeping everything visible so you can find items quickly, or for items you would prefer to keep out of sight, drawers, cabinets, and cupboards are an affordable choice, for a more minimalistic approach.

You can be really creative when it comes to storing things like, loose screws, nuts, bolts and other smaller items in old coffee cans or jars.

A lack of floor space impacts movement, so when it comes to storing your items, hooks and brackets are an excellent choice. They can be attached to walls or hung from ceilings to free up work surfaces and floor space, for items such as gardening equipment or bicycles.

Zone It!

By zoning different areas for certain purposes, you can create areas like home maintenance where you store items like, power tools and paint or a gardening section for your lawn mower, and other gardening paraphernalia.

By zoning your garage, you keep it tidy, you know precisely where to find specific items when you need them, and everything is grouped together.

At Build it Hermanus, we have a vast array of storage options to choose from, please get in touch and we’d be happy to help with advice, on which products would suit you.

Please send us a photo of your newly organised garage, we would love to see it, you can upload your images in the comments section!

Plan your next DIY project with Build it Hermanus and get the job done right, first time.

Please follow us on social media to stay up to date with our latest sizzling specials and promotional offers!

Or, log on to our online store and shop from the comfort of your home: www.buildit-store.co.za

Build it Hermanus offers added value services in respect of hardware retailing; embracing all activity within the building materials industry, focusing specifically on the building of; urban, township, rural housing as well as all home improvements and do it yourself.

 

Categories
Do It Yourself

How To Fit Locking Laminate Flooring

Build it Hermanus everything to make home building simple, providing building materials to build your home from the foundations to the finishes and fittings!Summer is upon us; the year is winding down and Michael Bublé is defrosting as we speak. It’s almost time to get your DYI on.

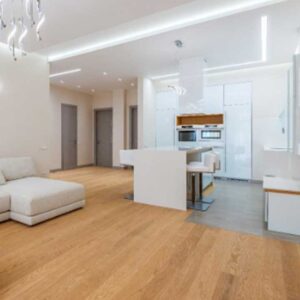
Nothing transforms a home like a new floor, from drab to fab, so we are going to give you step by step instructions on, how to fit locking laminate flooring. Laminate flooring is a great flooring option because you can have the beautiful look of a hardwood floor without all the maintenance.

Installing a laminate floor may see like a daunting task, but with some basic knowledge and a small array of tools, the average homeowner can install a floor in a relatively short amount of time.

What you will need:

Tools and Materials:

  1. Scissors or a Knife
  2. Set Square
  3. Pencil
  4. Ruler
  5. Dust Mask
  6. Hacksaw or Jigsaw (with laminate blade)
  7. Trim Cutters
  8. Fitting Wedges or Expansion Spacers
  9. Underlay to cover the size of your floor
  10. Laminate flooring of your choice
  11. Laminate flooring trim

Build it Hermanus stocks everything you will need for this project, you can order all these items online, from the comfort of your own home and delivered straight to your front door.

Check it out! www.buildit-store.co.za

Locking Laminate Flooring

Locking flooring boards have long and short tongues on the sides and the ends that lock together. It is easy to unlock the floor again if you want to move it.

Condition the boards before fitting, lay them horizontally in their packing in the room where they are to be used for at least 48 Hours.

Let’s Get Started!

Laminate flooring expands and contracts naturally, so you need to leave a gap of 10mm between the boards and the skirting board when fitting, using fitting wedges or expansion spacers.

Lay the first board length ways in a left-hand corner over your underlay, the end with the short tongue against the wall.

Fit wedges at intervals between the board and the skirting following the manufacturer’s instructions, and check that the board is square with the wall.

Viola! Look at you, all fancy and stuff, that was the hard part! 😉

Place the short end of the next board at an angle against the previous board and fold down, making sure the board is on the locking strip in the previous row.

Angle boards by 30 Degrees and push against the row in front, when boards are tightly together push them down.

For the last row, place a board at a time over the previous row. Place a third board on top with the tongue touching the skirting and use the edge to mark the cutting line on the board beneath.

Cut the board and ease into position. See, Easy Peasy! Now for the trim…

Build it Hermanus

Floor Trim

Once the flooring is laid, you can remove the fitting wedges and cover the gap around the edge of the room with laminate flooring trim, chosen to match the colour of the floor. The trim should be fixed with adhesive to the skirting, not the floor!

Measure and cut lengths of laminate floor trim, apply trim adhesive to the back of the length of flooring trim so that it will stick to the skirting board and not the floor.

Press the trim into place and if necessary secure them with some heavy weights while the adhesive dries.

All done!

Please send us a photo of your new floor, we would love to see it, you can upload your images in the comments section!

Plan your next DIY project with Build it Hermanus and get the job done right, first time.

Please follow us on social media to stay up to date with our latest sizzling specials and promotional offers!

Or, log on to our online store and shop from the comfort of your home: www.buildit-store.co.za

Build it Hermanus offers local delivery, supplying the greater Overberg area with building materials, do-it-yourself home improvement tools, and expert advice.

Build it Hermanus offers added value services in respect of hardware retailing; embracing all activity within the building materials industry, focusing specifically on the building of; urban, township, rural housing as well as all home improvements and do it yourself.

Categories
Do It Yourself

How to Make a DIY Cat Bed

Our animals are family to us, they are our fur children, and we treat them as such. So today we will be showing you, “How to make a DIY Cat Bed”.

Yes, a cat bed. Cat’s, I believe are highly underrated, we tend to give our dogs all the glory, fabulous creatures that they are, but today we will be making nice with the Cat😉

Let’s begin by saying that, “Cat people are more open-minded than dog people. Cat lovers generally score higher on things such as open-mindedness, imaginativeness, creativity, adventurousness, and holding unconventional beliefs. 

Dog owners, much like dogs, will pretty much believe anything you tell them. (The cat is loving this!) Since I bore easily; I love to get creative, doesn’t mean I am always very good at it, but I give it a swing anyway. I think the best place to start would be, where does your cat like to sleep? We will need to colour coordinate, so that the cat bed/tepee matches the décor. I am sightly OCD and even if I was not, we would still need the décor to balance, cannot have your home looking like a “Smartie Box”!

Either way, it is going to look absolutely, adorable! So, let’s get started, we can finish this today!

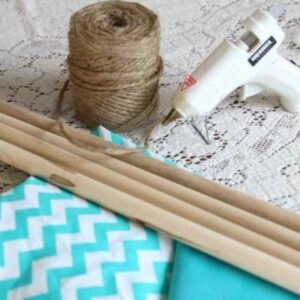
Tools and Materials Required:

Fabric: Two Meters will do

Jute String: A Roll – Jute twine is a natural vegetable fibre twine primarily used in the arts and crafts industry, excellent for a variety of crafts, packaging and wrapping as well.

  • Hot Glue Gun & Glue Sticks
  • Small Hand Saw (optional)
  • Thick Wooden Sticks: x 4 same length for Hight (Dowl Rods)
  • Thin Wooden Stick: x 1 long for support (Dowl Rod)

Build it Hermanus DIY

You can find all these items at your local Hermanus Build it or buy online at www.buildit-store.co.za shop now for free delivery in the greater Overstrand Area!

The 4-x thick wooden sticks will stand to make the frame of your DIY Cat Bed Teepee. We did not cut them down in length.  

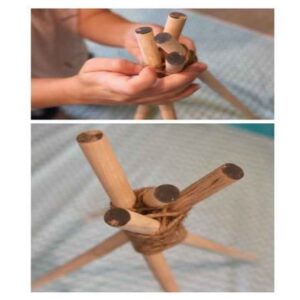
We left them the in the original height and it worked perfect for us. If your sticks are too long, you can shorten them to the desired height.Once you gather your four posts together at the top to make a triangle of sorts, you must hold the sticks into place and use the jute string to secure it, using a winding motion.

When wrapping the post with the jute string it is easier to secure if you wrap between each post. Wrap once around the first stick, then loop around the next and just keep wrapping.  Do this about three times before wrapping the outside of the sticks to hold together, this is the best way to secure each post to the one next to it.

*Do not wrap the jute around the individual posts too much or it will cause thickness between the sticks. Just a couple of times to secure it.

Build it Hermanus DIY

To make the top of your teepee look authentic, wrap the jute around, using your hot glue gun to secure each piece in place. The bottom of the posts will try to come together so you may need two people to old them apart, for this part.

The bottom of the posts should form a rectangle, so there is plenty of room for your cat’s blanket to go inside the teepee.  We measured roughly 1200mm around the bottom, this is how I knew we only needed two meters of fabric in length to wrap around.

Even after adding the jute around the top of your teepee the bottom may still try to come together.  This is not unusual.  To secure your teepee in place use the smaller stick you purchased to place support bars between the outer posts.

We used a small handheld saw to cut the smaller stick into pieces and hot glue to secure in place.  On the sides we placed the support bar towards the top and on the back, we placed one across the bottom.

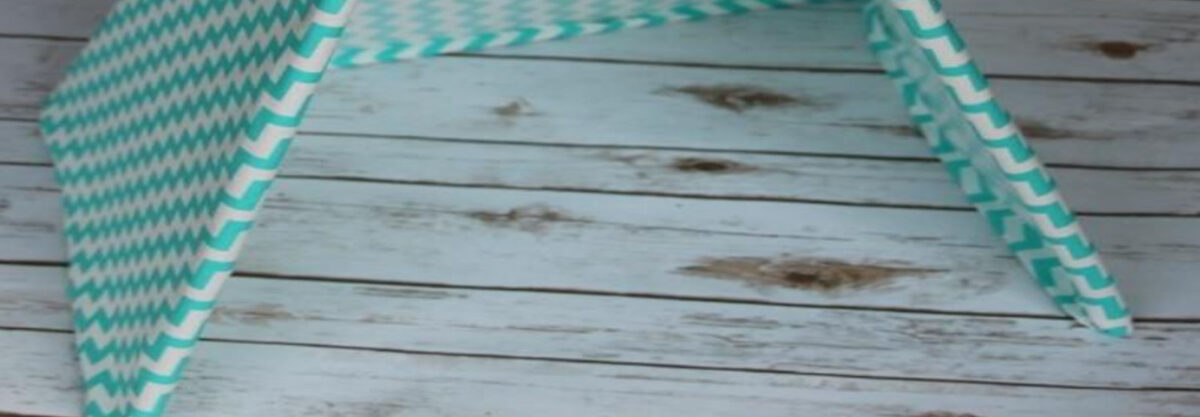
Now that your teepee frame is complete, it is time to add the fabric. This is the hard but fun part and can be slightly difficult for one person to do alone. Start in the back, trust me on this one! If you start on one side and try to work your way around the fabric will gather and twist. 

It will not lay on straight, and the pattern of your fabric will look untidy.

If you start in the middle of your fabric, on the back of your teepee and wrap each side towards the front, it will lay much smoother. As you lay the fabric on the top back of your teepee, directly under the jute string, use your hot glue to secure the fabric into place.

You will find that you have quite a lot of fabric left once you have pulled it forward, just cut it off once you have secured it in place, tuck, and hot glue around each post as you go.

It’s like tucking in a sheet on the corner of your bed, all sides should be nice and smooth.

Voila! Your Masterpiece is complete!

Here Are Some Fun Facts:

Pet.webmd.com found that some common ideas about pet lovers may be true. You may also be a lot more like your furry friend than you ever realized.

The Typical Cat Person

Do you prefer to spend time on your own? Always game to try new things. Then you could be a cat person. The survey found that cat owners were more likely to be curious, unconventional in thinking and actions, and more prone to worry than dog people.


Personality Trait: Open

Are you open to trying new things? Cat people were 11% more likely to be open, according to the survey. Open people tend to be:

  • Curious
  • Creative
  • Artistic
  • Non-traditional thinkers

Personality Trait: Neurotic

If you get stressed out easily, you may be a cat person. Cat people were 12% more neurotic than dog people. Neurotic people are:

  • Easily stressed
  • Anxious
  • Worriers

Kitty Upside: Independent

Cats are famously low maintenance. They don’t need to be bathed or taken for walks. They can be left on their own for hours at a time. Even though cats like to do their own thing, they still need plenty of love and attention. Devote some time each day to playing with your cat, grooming them, or just giving them some TLC.


Kitty Downside: Can Be Standoffish

Some cats love to socialize, but others prefer to stay hidden, especially when new people visit. In fact, your friends may not even realize you have a cat! Cats who weren’t around people enough as kittens may be skittish. Even the friendliest cat will jump off your lap and sashay off when they have had enough of your attention.


Kitty Upside: Cozy Companion

When it comes to cuddling, cats take the prize. And most cat owners will tell you the sound of a purring cat is deeply soothing. In fact, when researchers looked closely, they found stress levels and blood pressure dropped slightly in people who snuggled up to a purring kitty.


Please send us a photo of your completed creation, we would love to see it, you can upload your images in the comments section!

Remember to plan your next DIY project with Build it Hermanus, get the job done right, first time. Follow us on social media, to stay up to date with our latest sizzling specials and promotional offers!


Shop online www.buildit-store.co.za or visit us instore at Build it Hermanus, your local building materials partner, helping you make home building simple! Build it Online store offers Free local delivery, supplying the Overstrand area with building materials, do-it-yourself home improvement tools, and expert advice.


Build it Hermanus offers added value services in respect of hardware retailing; embracing all activity within the building materials industry, focusing specifically on the building of; urban, township, rural housing as well as all home improvements and do it yourself.
 

Build it is a division of the SPAR Group Limited South Africa. A voluntary trading group of individually owned retail stores with more than 10 000 employees across the group, we currently have stores in South Africa, Namibia, Swaziland, Lesotho and Mozambique with plans to expand into Botswana and Zambia in the near future. We view ourselves not only as a supplier of materials, but as a partner to our valued customers in accomplishing their building or renovating projects.

Categories
Do It Yourself

Restore a Deck

Wood deck covering: An affordable alternative to replacement

Keeping a wood deck looking good takes a lot of work. The boards can still crack and splinter, making the deck look old and worn. The best way to restore your existing deck is by applying a deck paint restoration product.

Tools required for this Project

  • Paint tray
  • Paintbrush
  • Safety glasses

You will also need special application rollers (one roller for every 15 Litres of restoration coating), a firm scrub brush, a roller extension pole, and a high-pressure hose. (High-pressure hoses can be rented if you do not own one.)

Materials required for this Project

  • Masking tape
  • Plastic sheeting
  • Paint stirring sticks (you will need these to clean the product from the gaps between boards)
  • Acrylic caulk
  • Deck restoration coating
  • Deck cleaner (We suggest using a manufacturer’s recommended product twice a year to clean your deck)

Protect the wood with special coatings made specifically for restoring your deck

Deck paint restoration coatings can last about 12 years without additional applications, providing a completely new textured surface and is thick enough to fill all cracks, knotholes, and splinters.

This project can be completed over a period of three days.  On day one you can get all the preparation work done then on the following weekend you can apply the restore paint product over a two-day period.

 Here’s how to buy the best deck paint product, prepare the surface and apply it.

What is a Deck Restoration Coating?

Deck restore paint coatings are made from a long-lasting tint’able acrylic base material with UV inhibitors and added solids of aluminium/sand. Some brands of wood deck covering form an impenetrable barrier while others allow the wood to breathe while repelling water at the same time. 

All brands require that surfaces be prepared correctly beforehand, so read the manufacturer’s instructions carefully. For the best results, we recommend you apply two coats for the best performance.

Pick the wood deck covering 

Deck covering options

Build it Hermanus recommends Woodoc Water-Borne Deck. https://www.woodoc.com/

Developed in South Africa using the most advanced International Technology and high in UV-absorbers to withstand the harsh African sun and extreme weather, it is the answer to keeping decks looking beautiful for longer

A water-borne exterior sealer, especially developed for application to all exterior wooden decks and -staircases, as well as other exterior wood.

There are many fantastic products on the market, Build it Hermanus’s friendly staff would be happy to advise you on alternative products, so you will find the best deck paint to suit your needs.

Now that you have chosen a brand you like; you need to choose the colour of your wood deck covering carefully.  Dark colours retain heat so if your deck gets direct sunlight it might be too hot to walk on with bare feet.  Deck restore coatings absorb and retain heat longer than plain wood. 

We recommend you buy the manufacturer’s deck washing product to ensure compatibility with the deck coating. 

Prepare the surface

Protect the house with plastic sheeting and masking tape 

You will want to avoid paint from splattering on posts, rails, and the sides of the house by wrapping the exposed areas with plastic sheeting and masking tape.  Spread poly sheeting under the deck to catch the paint dripping through the board gaps.

Reset any nails that are protruding and secure any loose boards with deck screws to start with.  Next using an 80-grit sandpaper, sand the deck to remove any old product and rough up the surface.

 Dilute the deck cleaning product according to manufacturer’s instructions, apply it, and let it soak in. Scrub the entire deck using a firm scrubbing brush making sure to remove all the grease. Now use the high-pressure hose to remove the ground-in dirt on and in between the boards.  

Good Job! 

Let the wood dry for about a week before applying the restoration product. It’s been a week; the weather is beautiful and it’s time to get back to work! Great, Let’s get on with it and apply the first coat

Roll on the deck restore coating

To get started, fill the holes and cracks with latex caulk and let it set. Go ahead, dip your roller in the pail, place it on the deck boards pressing down to get a good thick first coat and start rolling.

Work slowly and meticulously, coating several boards at a time, to ensure the proper coating thickness.  Great, you have completed your first coat, now let the first coat dry for about six hours or dry to the touch.The first coat is only your primer and its purpose is to make sure all the areas that have been restored are covered and sealed.  Once the second coat is applied you will have a very different look.

Now that your first coat has dried you are ready to apply the second coat using the same method.  

The second coat takes longer to dry so we recommend that you let your deck dry for at least two full days before using it.

Great Job!

Please send us a photo of your newly restored deck, we would love to see it, you can upload your images in the comments section!

Plan your next DIY project with Build it Hermanus and get the job done right, first time. Please follow us on social media to stay up to date with our latest sizzling specials and promotional offers! Or, log on to our online store and shop from the comfort of your home: www.buildit-store.co.za

Build it Hermanus offers local delivery, supplying the greater Overberg area with building materials, do-it-yourself home improvement tools, and expert advice.

Build it Hermanus offers added value services in respect of hardware retailing; embracing all activity within the building materials industry, focusing specifically on the building of; urban, township, rural housing as well as all home improvements and do it yourself.
Categories
Do It Yourself

DIY Fire Pit

Introduction

What is better than sitting around a crackling wood fire pit with your friends this winter? 

Don’t have one?  Not for long, we are going to teach you step by step how to build an in ground fire pit in your own backyard.

do it yourself fire pit

What you will need:

Tools:

  1. Brick hammer
  2. Bucket
  3. Concave jointer
  4. Concrete float
  5. Cordless drill
  6. Level
  7. Margin trowel
  8. Mason’s trowel
  9. Safety glasses
  10. Spade
  11. Tuckpointing tool
  12. Wheelbarrow

Materials:

  1. 120 face bricks
  2. 25 firebricks
  3. Can of spray-paint
  4. 92 cm (Length) 20cm (wide) cardboard concrete form
  5. 122 cm (Length) 20cm (wide) cardboard concrete form 
  6. Five x 40kg bags of Type N mortar mix 
  7. One 2 Litre bucket of refractory cement (sold at a brickyard)
  8. Ten x 40kg. bags of concrete mix 
  9. Two x 3-meter lengths of 3/8-in. rebar

Overview:  How to Build a Fire Pit 

Getting Started on Building your Fire Pit

Fire pits have become very popular of late and it doesn’t take a rocket scientist to build one.  Most importantly the fire pit must be solid, safe to use and last decades, so let’s do a good job😉

This project will only take a few days and as you follow the step by step instructions you will see why.  The first step is pouring the footing and letting it set, then you will start mortaring the bricks into place.

Step 1

Remember!
Before Digging, make sure that you do not damage any underground electrical wires or water pipes.

Make sure that the location is not too close to buildings and overhanging trees. When the wind picks up, you do not want to burn anything down!

Step 2

Mark Out the Fire Pit

Dig out a dedicated space in your yard for the fire pit base by following the dimensions below:

  • A 92cm – diameter in ground fire pit creates enough room for a good fire while keeping everyone close enough to chat and be social.
  • To make measuring the pit and pouring the concrete footing easy, we used two cardboard concrete form tubes (purchased from a concrete supply company).
  • Carefully bend and screw the two ends together to create a 92cm – diameter circle and use the other to bend and make a 122cm – diameter circle.
  • Set the larger form in position and spray paint around it. Dig a hole about 20cm deep and 8cm larger in diameter than the form.

mark out fire pit

Step 3

Level the Pit

  • Dig the soil out about 20cm deep for your fire pit base and check that the bottom of the hole is level.
  • Now compact the soil to remove any high spots.

level fire pit

Step 4

Stake the Forms to keep them in place while you pour the footing for your fire pit base.

  • Place the larger of the two concrete forms in the hole you have dug and place the smaller of the two concrete forms on the inside.
  • The concrete footing creates a stable base for the pit walls and will keep the sides from cracking as the ground moves over time.
  • Mix up Ten x 40kg bags of concrete mix according to the manufacturer’s directions.
  • If the forms are not completely round, reposition the stakes slightly.

stake the forms fire pit

Step 5

Add the Rebar

  • Bend rebar into half-circles for this circle fire pit and tie them together with wire to make a ring.
  • Fill in between the forms halfway then press the ring into the concrete for strength and stability, making sure the rebar circle does not touch the sides of the forms.

add rebar to fire pit form

Step 6

Finish the Footing

  • Fill the forms to the top with the remaining concrete and tap the cardboard concrete mould tubes gently with a sledgehammer until the concrete mix is level and smooth.
  • Let the concrete set overnight then remove the forms.

finish fire pit footing

Step 7

Dry-Set the Firebrick Liner

  • Your normal clay brick can crack at high temperatures, so we are going to use firebricks to line the inside of the fire pit walls. (also called “refractory” brick as used in pizza ovens) – Firebrick is a dense brick that’s made to withstand high temperatures.  They are a bit more expensive but will last for many years.
  • You will need 25 firebricks for a 92cm diameter pit.
  • Pack the firebricks vertically around the mouth of the firepit, flush with the footing and mark the position behind every brick, with a pencil.
  • Firebricks are tougher to split than your normal building bricks. “Soldiering” the brick minimizes the splitting and lets you easily accommodate the curve of the pit.
  • You will need to split four firebricks in half, which you’ll place across from one another around the pit to create draw holes, to allow oxygen in for your fire.
  • Once you have split your firebricks, dry-set them in place on top of the footing.

dry set the firebrick

Step 8

Mortar the Firebrick

  • We are going to use a 2 Litres of refractory cement to mortar the firebricks, as it can withstand high heat.
  • You can buy refractory cement remixed in a bucket and has a thick consistency.
  • Work with four bricks at a time and trowel the cement on thin then position your bricks. A margin trowel makes it easier to scoop cement out of the bucket.
  • REMEMBER to leave four gaps in four opposite points around the ring to insert your half bricks. These gaps are the “draw holes” that are going to feed your fire with air.
  • Continue around the circle making sure that your levels are straight as you go.

mortar the firebrick

Step 9

Create Air Holes

  • The top of the half brick must be level with the tops of the firebricks so you will have to apply mortar and prop the half brick into place until the mortar has set. 
  • Use another brick to hold it up and once it has set pull the loose brick out.

create air holes in fire pit

Step 10

The Outside Walls can now be completed using Face Brick

  • We used face brick also known as building bricks to complete the exterior of the fire pit walls. 
  • You will need 80 face bricks for an outer layer packed horizontally.
  • The face bricks can easily be split in half with a brick hammer.  Half bricks work better to accommodate the curve of the pit walls.
  • Mix your Five x 40kg bags of Type N mortar mix as per manufacturer’s instructions then you are going to lay three courses of face brick and mortar.
  • Face bricks are smaller than firebrick so keep in mind that the total height of three stacked face bricks will determine the width of your mortar beds between courses.
  • It’s always better to dry-set the face bricks by marking on the fire bricks to be sure that the third course of face brick will be level with the top of the firebrick.

Step 11

How to Split 80 Face Bricks in Half

  • Firstly, put your gloves on, you are going to need your hands “in working order” to finish your fire pit😊
  • Hold the brick in the palm of your hand, now give it a solid tap in the centre on the outer edge.
  • Tap, split, repeat.

split brick

Step 12

Set the Face Brick

  • Lay a 5cm thick bed of mortar right on top of the footing, to keep your mortar joints a reasonable width between courses.
  • Take a 15-minute break to let the mortar set, then smooth off the top.

set face brick fire pit

Step 13

Work in Sections

  • Working in sections applying fresh mortar on each section before securing the face brick into place.
  • Check the level of each section, tap down the bricks as necessary, making sure the face bricks are aligned with the outer footing.
  • Staggering the joints between sections increases the overall strength of the pit wall.

lay fire pit brick

Step 14

Smooth/Strike the Joints

  • Once you have finished each section of face brick, use a jointer to smooth the joints before the mortar dries too much.
  • If you press your finger into the mortar and an indentation remains, the mortar is ready for smoothing.  This will give the outer wall a polished look.
  • REMEMBER to leave the draft holes open as you mortar the face bricks into place!

strike mortar joints fire pit

Step 15

Finish Off the Top Lip

  • Firstly, Mortar the top of the brick caps.
  • Finish the pit with a matching row of regular face brick placed horizontally on their sides.
  • You will need about 40 face bricks for this cap.
  • Mortar each brick on the outside edge and press it into place.
  • For a more sophisticated look, you can use natural stone, to change the look and feel😉

mortar the fire pit brick caps

Step 16

Fill Gaps

  • Check your joints and add a small amount of mortar to fill any gaps.
  • Strike the joints with a concave jointer for a smooth look once all the bricks have been mortared into place, checking the level as you go.

fill gaps in fire pit brickF

Step 17

Finished DIY Fire Pit

  • You will want to wait about a week for the cement to cure properly before making a fire in your new pit.
  • Only thing left to do now, invite all your friends over, for the fire pit lighting ceremony next weekend.
  • Enjoy and please send us pictures of your masterpiece, we would love to see them!

do it yourself fire pit