Who said DIY home decor was only for the pros? Today, I’ll show you how to whip up your very own fabulous concrete tray using the reverse casting technique. With straight handles and a smooth surface, this functional piece will add a touch of elegance to your space in no time.
Okay, let’s get started on making your very own concrete tray! But first, grab your favorite beverage and put on some lively music. It’s time to unleash your inner DIY enthusiast!
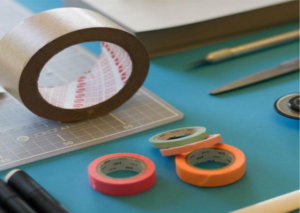
Materials List for Your DIY Concrete Tray:
The Tray Mold:
- These 5″ handles (the coolest ones you can find, of course)
- PVC casing 2 ¼” (this stuff is a dream to work with)
- 1″ Foam insulation board (or ¾” plywood if you’re feeling adventurous)
- Dowel ¼” diameter
- (8) Wood screws 1 ¼” #8 or 10
- Power drill
- Phillips screwdriver
- ¼” Forstner bit (for those perfectly clean dowel holes)
- Scissors
- Acetate film sheet (optional, but it helps keep things smooth)
- Snap-off razor knife
- Painter’s tape
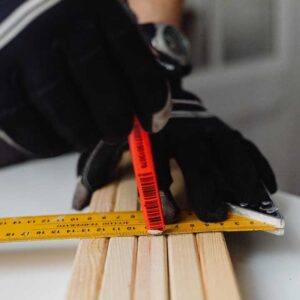
- 12″ Ruler
- Orbital sander
- Level – 9″
- Dremel Multi-tool or flush trim saw (for the fancy finish)
- Chisel
Concrete Materials:
- Concrete mix
- Disposable bowl
- Disposable cup
- Durable nitrile gloves
- Safety glasses
- Safety mask – rated for silica dust
Sealing and Finishing:
- Orbital sander
- 180 and 320 grit sandpaper
- Sealer
- Foam brush
- Silicone bumpers
Now, before we dive in, let’s have a quick chat about some material notes:
Tray Thickness and Handles: Initially, I thought we were limited to a ¾” thick tray due to the screw length for the handles. But fear not! You can go all the way up to a luxurious 1″ thick tray.
It’s sturdier and less likely to crack. Plus, it won’t weigh you down too much. Trust me, even the ¾” version is lighter than it looks!
PVC Casing: Ah, the beauty of PVC casing. It’s like a concrete maker’s secret weapon. It cuts like butter, and concrete won’t stick to it. Working with it is an absolute breeze, making your DIY dreams come true.
Foam Board: If you’re not feeling the foam, you can swap it out for ¾” plywood. Just be cautious about concrete seeping into the plywood around the dowels. However, using plywood allows you to overlap the base with the sides and screw them together, making vibrations a piece of cake.
Forstner Bit: Don’t underestimate the power of the Forstner bit! It ensures clean dowel holes in the foam, preventing any concrete mishaps. We want those dowels to fit like a glove and keep things sturdy.
Acetate: Want that flawless finish? Consider using acetate as a layer between the foam board and concrete. It smooths out any imperfections and gives your tray a polished look.
Dremel Multi-tool or Flush Trim Saw: While a multi-tool makes life easier, a flush trim saw can also do the trick. If you opt for the saw, it’ll require a little more effort. But hey, we’re all about enjoying the process, right?
Timing: Good news! This DIY adventure should take you less than 2 hours of actual working time. But remember, patience is key. Allow 2-4 days for curing and sealing. Rome wasn’t built in a day, and neither is your concrete tray!
Alright, let’s jump into it!
How To Make A DIY Concrete Tray in 12 Steps
Step 1. Cut Your Base Mold Piece
Let’s kick things off by cutting the foam board for the base of your concrete tray. Grab your retractable snap-off blade knife and get ready for some foam-cutting fun!
Start by scoring the board lightly with a pencil, then go over it with the blade to make the cut.
Remember to use the factory-cut edges for the best results. Make two cuts, keeping the blades long and holding the knife as perpendicular to the board as possible. Voila! You’ve got your base mold piece, measuring a cool 18×12″.
Step 2. Cut Dowel Pieces
Now it’s time to tackle the dowel pieces. Grab a hand or miter saw and cut the wood dowel into four equal pieces, each measuring 2″ in length. Aim for ninja-level precision here and make sure all four pieces are the same length.
Step 3. Cut The Sides Of The Concrete Tray Mold
Let’s shape things up! Take the PVC molding and cut it into four pieces: two measuring 18″ and two measuring 13 ½”. These will be the sides of your concrete tray mold. Get those PVC cutters ready and let the cutting commence!
Step 4. Cut Acetate To Fit The Base
Time to add a touch of smoothness to your tray. Lay a piece of acetate film on the table and place the foam board on top. Carefully trace around the base and cut the acetate to fit perfectly with a trusty pair of scissors. This will give your tray a flawless finish.
Step 5. Fasten The Sides Of The Concrete Mold Box
Let’s secure those sides, shall we? Wrap the PVC boards around the foam base and use clamps to hold them in place. Attach the short ends to the long ones by drilling two pilot holes and then screwing in each screw. Keep it tight and secure!
Step 6. Cut The Holes For The Handle’s Screws
Now it’s time to plan the perfect spot for your handles. Place the acetate on top of the foam base, ensuring a snug fit without any air bumps underneath.
To keep things clean and precise, tape the ends with blue tape. Measure 4 ½” from each edge and mark the centre for your screw hole.
Double-check that everything lines up with the handles. Carefully drill the holes using a low torque setting on your drill. Insert the dowels into the holes, stopping when they are flush with the bottom of the foam base. These exposed dowels will serve as your fill line for the concrete mix.
Step 7. Mix The Concrete And Cast The Tray Mold
It’s time to get your hands dirty with concrete mixing! Aim for a mud pie consistency by combining two batches of concrete mix. Scoop the mix into the Mold until it’s flush with the tops of the dowels.
Remember not to fully cover the dowels, but a little bit is fine. Give the Mold a good vibration to release any air bubbles and ensure a smooth surface. Slide the Mold back and forth on your work surface to self-level the mix and use an orbital sander without sandpaper to vibrate along each side.
Take your time with this step, and don’t be afraid to vibe it for about 15 minutes if needed. Before letting it cure, carve out a bit of concrete around each dowel to ensure a flush fit for the screw heads.
Step 8. Demold The Tray
The moment has arrived to unveil your masterpiece! Unscrew the sides of the Mold, but make sure the tray has a frosted appearance and the sides are no longer moist.
Place a towel on your work surface, flip the Mold over, and gently remove the foam board and acetate. Hang on to that acetate sheet—it might come in handy for the next step.
Step 9. Fasten The Handles To The Concrete Tray
Time to add some handles to your tray! Before you proceed, let the concrete cure for an additional day or two to ensure maximum strength.
Once you’re ready, use a Dremel multi-tool or a flush-cut trim saw to cut the dowels flush with the tray. Take extra care not to scratch the tray while cutting. If needed, protect the tray with the saved acetate sheet. Pre-drill pilot holes for each handle screw, ensuring they align perfectly.
Turn the tray on its side and drill the screws until they peek through the wood on the front side. If any screws don’t align with the handles, use a larger drill bit to redrill the pilot hole. Secure those handles in place!
Step 10. Sand The Serving Tray
Time to smooth things out and make your tray even more beautiful! Grab an orbital sander and some sandpaper (180 or 220 grit) to sand the bottom of the tray. Switch to a 320 grit pad and sand the top and sides for a flawless finish.
Even if you love that glossy sheen, lightly sanding it is important to prevent easy scratching. Don’t forget to go over the back of the tray again with the 320 grit.
Step 11. Seal The Tray
Give your tray the royal treatment by sealing it. Use a foam brush to apply the sealer to the top, then flip the tray over by its handles and seal the sides and back.
If you have any rough edges, make sure to push the brush into them to get that sealant deep into the holes. Applying a second coat is highly recommended for added protection. Wait approximately 24 hours before applying the second coat, and within 6-8 hours after sealing, your tray will be ready to use!
Step 12. Add Silicone Bumpers To The Bottom Of The Concrete Tray
Last but not least, let’s ensure your tray doesn’t scratch your table. Attach silicone bumpers to the bottom of the tray—one at each corner, about an inch in. These little protectors will keep your table safe while adding a touch of style to your DIY creation.
And there you have it—a fantastic, handmade concrete tray that’s ready to impress! Enjoy serving your favourite goodies in style while basking in the glory of your DIY prowess.
Send us a photo of your new concrete tray, we would love to see it, you can upload your images in the comments section!
Plan your next DIY project with Build it Hermanus and get the job done right, first time. Please follow us on social media to stay up to date with our latest sizzling specials and promotional offers! Visit our Build it Hermanus Facebook page today! Learn more about Build it Hermanus here.
Or log on to our online store and shop from the comfort of your home: www.buildit-store.co.za.
Build it Hermanus offers added value services in respect of hardware retailing; embracing all activity within the building materials industry, focusing specifically on the building of; urban, township, rural housing as well as all home improvements and do it yourself.